

Mastering the Art of Crafting Natural Soy Candles
- candlesbykelly
- Jan 7
- 4 min read
Creating your own natural soy candles is a delightful journey that combines creativity, mindfulness, and a touch of science. Whether you’re looking to brighten your home with eco-friendly light or searching for the perfect gift, mastering this craft opens up a world of possibilities. I’m excited to share everything I’ve learned about crafting natural soy candles, from choosing the right materials to adding your personal flair.
Why Choose Crafting Natural Soy Candles?
Soy candles have become a favourite for many reasons. Unlike traditional paraffin candles, soy wax is made from soybean oil, a renewable resource that burns cleaner and longer. This means less soot and a more environmentally friendly experience. Plus, soy wax blends beautifully with natural fragrances, making it ideal for those who appreciate subtle, fresh scents inspired by nature.
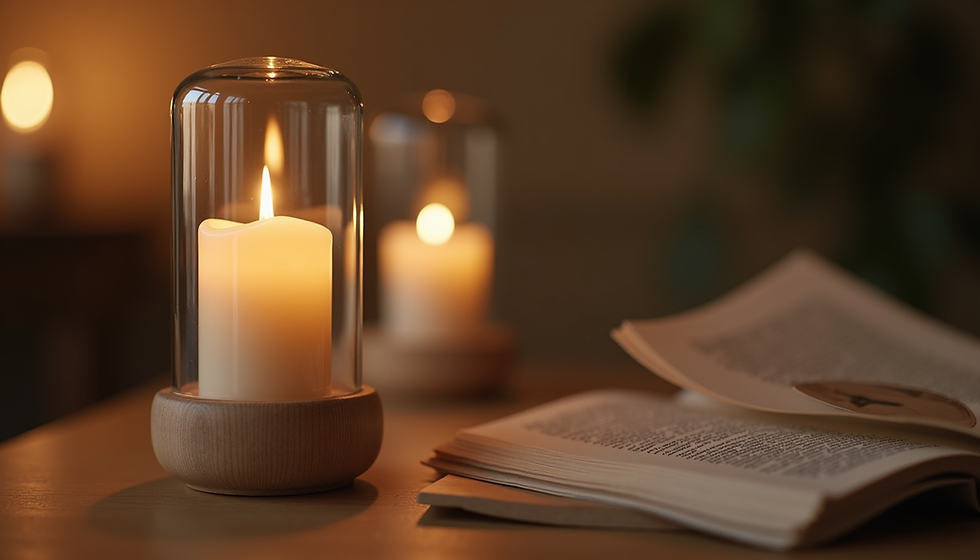
When you start crafting natural soy candles, you’re not just making a product - you’re creating an atmosphere. Imagine the soft glow of a candle flickering in your living room, filling the air with the scent of eucalyptus or lavender. It’s a simple pleasure that can transform any space into a sanctuary.

Essential Materials and Tools for Crafting Natural Soy Candles
Before you dive in, it’s important to gather the right materials. Here’s a quick checklist to get you started:
Soy wax flakes: Choose 100% natural soy wax for the best results.
Wicks: Cotton or wood wicks work well; the size depends on your container.
Containers: Glass jars, tins, or ceramic holders are popular choices.
Fragrance oils: Opt for natural or phthalate-free oils to keep your candles eco-friendly.
Thermometer: To monitor wax temperature accurately.
Double boiler or melting pot: For safely melting the wax.
Stirring utensil: A wooden spoon or heat-resistant spatula.
Wick holders or centering devices: To keep the wick straight while the wax sets.
A little tip: Always test your wick size with your container and wax type. The right wick ensures a clean, even burn without excessive smoke.
Step-by-Step Guide to Crafting Natural Soy Candles
Let’s walk through the process together. It’s easier than you might think, and I promise it’s fun!
Prepare your workspace: Cover surfaces with newspaper or a silicone mat to catch any spills.
Measure your wax: Calculate the volume of your container and double it to get the amount of wax flakes needed.
Melt the wax: Use a double boiler to gently melt the soy wax, stirring occasionally. Keep an eye on the temperature - aim for around 75°C (167°F).
Add fragrance: Once melted, remove from heat and let the wax cool to about 65°C (149°F) before adding your fragrance oils. Stir gently but thoroughly.
Attach the wick: Secure the wick to the bottom of your container using a wick sticker or a dab of melted wax.
Pour the wax: Slowly pour the scented wax into your container, leaving a small gap at the top.
Center the wick: Use a wick holder or pencil to keep the wick upright and centered.
Let it set: Allow the candle to cool and harden at room temperature for several hours or overnight.
Trim the wick: Cut the wick to about 1 cm before lighting your candle.
Patience is key here. Rushing the cooling process can cause cracks or uneven surfaces, but a little waiting results in a beautiful, smooth finish.

Tips for Personalising Your Soy Candles
One of the best parts of crafting natural soy candles is making them your own. Here are some ideas to inspire your creativity:
Experiment with scents: Blend essential oils like eucalyptus, lemon myrtle, or tea tree for a uniquely Australian aroma.
Add colour naturally: Use dried flowers, herbs, or natural colourants like turmeric or spirulina powder.
Choose unique containers: Reuse vintage teacups, small terracotta pots, or handmade ceramic vessels.
Create themed sets: Think seasonal scents or mood-based collections like “Relaxation” or “Energise”.
Remember, the goal is to enjoy the process and create something that feels special to you or your gift recipient.
Caring for Your Soy Candles and Encouraging Sustainability
Once your candles are ready, caring for them properly will extend their life and maintain their beauty. Here are some simple tips:
Always trim the wick before each burn to prevent soot.
Burn your candle long enough for the wax to melt evenly across the surface - this avoids tunnelling.
Store candles in a cool, dry place away from direct sunlight.
Consider using refill services or reusable containers to reduce waste.
By choosing soy candles and supporting brands that promote sustainability, like Wattle N Wicks, you’re making a positive impact on the environment. Their commitment to refill services and eco-friendly practices aligns perfectly with the values behind crafting natural soy candles.
If you want to explore more about handcrafted soy candles, Wattle N Wicks offers a beautiful range inspired by Australian nature, perfect for gifts or wholesale partnerships.
Bringing Warmth and Nature Into Your Home
Crafting natural soy candles is more than a hobby - it’s a way to connect with nature and bring warmth into your living space. Each candle you make carries a story, a scent, and a glow that brightens your day and soothes your soul.
I encourage you to give it a try. Start small, experiment with scents and containers, and enjoy the calming rhythm of melting wax and flickering flames. Soon, you’ll find that these little lights do more than illuminate a room - they create moments of peace and joy.
Happy candle making!
Comments